Concrete Patio Calculator
Calculate cubic yards, bags, joint spacing, and installed cost for a rectangular or round patio.
Patio Details
Patio shape
Surface finish
Before you set forms
Measure inside the form boards. Add the fall away from the house to the far form before you pour, not to the screed after.
Estimates only. Not professional advice.
Concrete to order
2.61yd³
70.4 cu ft for a rectangular patio in broom finish, with your 10% waste allowance already in.
- Slab depth
- 4 in
- Wire mesh with laps
- 212 sq ft
- Saw cut depth
- 1 in
- Fall away from the house
- 1.5 in
Installed cost
- Broom Finish, installed
- $8 – $14 per sq ft
- Patio total
- 192 sq ft at 4 in
- $1,536 – $2,688
Last updated August 2026. Joint spacing checked against NRMCA CIP 6 by our expert review team.
Joint grid · saw cut plan
Control joint layout for your concrete patio
A patio slab is going to crack. Joints decide whether it cracks in a straight line you cut on purpose or in a fork across the middle. Spacing follows thickness, so this is the grid your own slab needs, drawn to scale.
Every cut runs the full width of the slab. Stopping one short leaves an inside corner, and the crack starts there.
Your joint schedule
CIP 6
- Max spacing
- 12 ft
- Grid
- 2 × 1
- Panels
- 2
- Panel size
- 12 × 8 ft
- Panel ratio
- 1.50 : 1
Joint spacing by patio slab depth
NRMCA CIP 6
4 in slabyours
8–12 ft
cut 1 in deep
5 in slab
10–15 ft
cut 1.25 in deep
6 in slab
12–15 ft
cut 1.5 in deep
8 in slab
15 ft
cut 2 in deep · at the ceiling
The wide end is the 36 times thickness ceiling, held to 15 ft whatever the depth. The snug end is 24 times, which is what to use on a slab that gets full sun or sits on clay. Saw the grid 4 to 12 hours after finishing. A panel left more than 1.5 times longer than it is wide shrinks unevenly and cracks across its own middle, which is the one crack the grid existed to prevent.
Seating · chairs pulled out
Sitting areas that fit on a concrete patio this size
Square footage will not tell you whether the table you want works. The slab has to hold the furniture footprint plus the strip each chair slides back into, on every side. This reads the dimensions you entered above and checks all eight against three clearances.
Your patio: 16 × 12 ft
6 of 8 fit at 36 in
Grill station only
Cart grill, 48 x 30 in
10 × 8.5 ft85 sq ft
Yes, with a 48 in lane behind the chairs
Bistro table, 2 chairs
30 in round table
8.5 × 8.5 ft72 sq ft
Yes, with a 48 in lane behind the chairs
Dining set for 4
48 x 30 in table
10 × 8.5 ft85 sq ft
Yes, with a 48 in lane behind the chairs
Round table for 6
60 in round table
11 × 11 ft121 sq ft
Yes at 36 in clearance
Dining set for 6
72 x 36 in table
12 × 9 ft108 sq ft
Yes, with a 48 in lane behind the chairs
Dining set for 8
96 x 40 in table
14 × 9.3 ft131 sq ft
Yes, with a 48 in lane behind the chairs
Fire pit, 4 chairs
36 in pit, chairs 30 in deep
14 × 14 ft196 sq ft
Only at 24 in, chairs and nothing behind them
Lounge set
Sofa, 2 chairs, coffee table
15 × 14 ft210 sq ft
Only at 24 in, chairs and nothing behind them
Clearance is counted on all four sides. The 36 in standard matches the minimum clear width for a walking route in the 2010 ADA Standards (section 403.5.1). Two adjustments are worth making by hand: a set backed onto the house wall or a raised bed only needs clearance on three sides, and a fire pit or grill wants 10 ft (3 m) from the house and any overhang, which decides where on the slab that zone sits rather than how big the slab is.
Cracking · where it starts
Where a concrete patio cracks, and what put it there
Six failures, in the order they are decided. Every one of them is settled before the concrete goes off, and every one shows up months later as a crack, a puddle, or a slab that has moved away from the house.
Pouring straight onto soil
The slab settles unevenly, and on clay it heaves every winter until it splits.
Strip 6 to 8 inches of topsoil, then compact 4 inches of crushed base with a plate compactor before forming.
Pouring it flat
Water sits on the slab and runs back toward the foundation instead of off the edge.
Build 1/8 inch per foot of fall into the far form. A 12 ft patio drops 1.5 inches from the house to the outer edge.
Pouring too thin
A 3-inch patio cracks inside a year under nothing heavier than furniture and feet.
4 inches is the floor. Go to 6 inches under a hot tub, a fire pit, or anything you would not carry alone.
Bonding the slab to the house
The patio and the foundation move at different rates, so the slab cracks at the door or lifts the siding.
Run a compressible isolation joint the full length of the wall before the pour, and keep it out of the slab's way.
Skipping the control joints
Shrinkage has to go somewhere, and with no cut to follow it forks across the open field of the slab.
Cut the grid above within 4 to 12 hours of finishing, at least a quarter of the slab depth and never less than 1 inch.
Sizing the slab before the furniture
A patio poured to a round number leaves chairs hanging off the edge, and a 2 ft shortfall is unfixable once it cures.
Check the sitting areas above against your dimensions, then set the forms to whatever that requires.
Pour day · in order
Pouring a concrete patio, in the order the work happens
Nine steps, and the order is not negotiable. Steps 1 to 5 happen over a weekend at your own pace. Steps 6 to 8 all happen inside one afternoon, which is why the joint grid is worth marking on the forms before the truck arrives.
- 01
Mark the slab and check it holds the furniture
Lay the outline out with string and stand the table and chairs inside it. The fit table above gives the number to beat before you dig anything.
- 02
Excavate 6 to 8 inches of topsoil
Dig past the organic layer to firm subgrade, out past the form line so the boards have something solid to sit against.
- 03
Compact 4 inches of crushed base
Plate-compact in two lifts rather than one. This is the layer that decides whether the slab settles, and it is the cheapest part of the job to get right.
- 04
Set the forms with the fall already in them
Drop the far form 1/8 inch per foot below the house side. Fall built into the boards is fall you cannot forget once the concrete is moving.
- 05
Fit the isolation joint and the mesh
Compressible filler down the full length of the house wall, then mesh on chairs so it sits mid-depth instead of on the base.
- 06
Pour to the far corner and screed back
Work away from the house so nobody walks through fresh concrete, and screed off the form tops rather than by eye.
- 07
Float, edge, then wait for the bleed water
Bull float straight after screeding, then leave it alone. Finishing while bleed water is on the surface is what leaves a slab that dusts.
- 08
Broom or stamp, then cut the joints
Texture first, then saw the grid within 4 to 12 hours of finishing. Cut too early and the edges ravel, too late and the slab has already picked its own crack.
- 09
Keep it damp for 7 days
Plastic sheeting or a curing compound. Curing is worth about half the final strength, and it costs almost nothing.
Section · under the surface
What sits under a concrete patio slab
The same job in section: base, slab, fall, joints and the finish on top. Everything below the concrete is decided in steps 2 and 3, and none of it can be revisited afterwards.
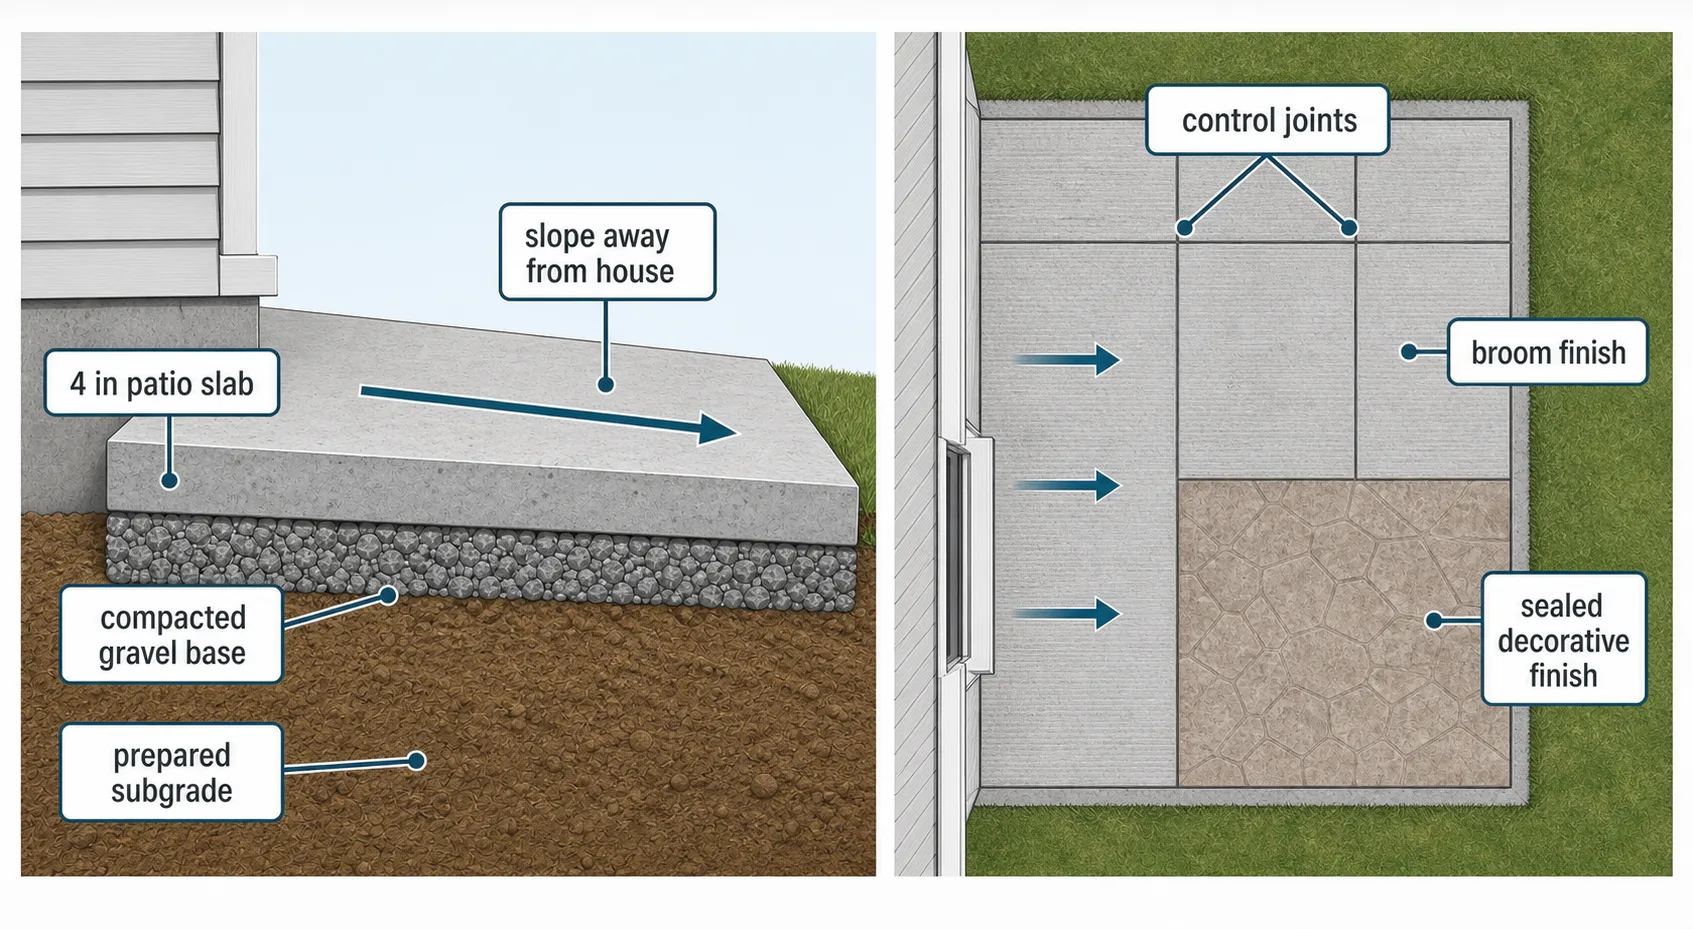
The sealed decorative finish on the right is the only layer you can change later. Base depth, slab depth and fall are all one-shot decisions.
Four patios, priced
Concrete patio cost by size: four worked jobs
Each one is this calculator run at 4 inches and 10% waste, with the joint grid the spacing rule gives at that depth. Only the footprint and the finish change between them.
Bistro · 10 × 10 ft, broom
$800 – $1,400
1.2 yd³ · 1 × 1 panel
100 sq ft at $8 to $14. A table for two and room to walk around it. One 10 ft panel is exactly the spacing ceiling, so no cut is needed inside the field.
Dining · 16 × 12 ft, broom
$1,536 – $2,688
2.3 yd³ · 2 × 1 panels
192 sq ft at $8 to $14. Holds a six-seat table with the chairs out and a grill at the end. One cut down the middle keeps both panels 8 by 12 ft.
Outdoor room · 20 × 16 ft, stamped
$4,800 – $8,960
3.9 yd³ · 2 × 2 panels
320 sq ft at $15 to $28. Dining, lounge and cooking zones on one slab. Four 10 by 8 ft panels, and stamped joints hide in the pattern if you plan the cuts first.
Fire pit · 14 ft round, exposed agg
$1,847 – $3,079
1.9 yd³ · 2 × 2 over the circle
About 154 sq ft at $12 to $20. A focal circle away from the house, so it takes no isolation joint but still needs the grid and the fall.
Digging out for one of these? The excavation calculator gives the spoil volume you will have to haul, which on the 20 by 16 job is more material leaving the yard than concrete arriving in it.
Inside the number
What the patio estimate covers, and what it leaves out
The volume is arithmetic and the cost is a market rate applied to your area. Neither covers the site work around the pour, and the last column is the part people forget: a finished patio is not a usable one for another month.
In this number
- Patio area
- 192 sq ft
- Slab depth
- 4 in
- Waste allowance
- 10%
- Volume to order
- 2.61 yd³
- Wire mesh with laps
- 212 sq ft
Priced separately
- Excavation and haul-away
- 6–8 in of soil
- Compacted base
- 4 in crushed
- Forms, stakes, isolation joint
- by the linear foot
- Sealer on a decorative finish
- every 2–3 yr
- Permit, where one is needed
- $50–$200
Before you can use it
- Saw the joints
- 4–12 hr
- Walk on it
- 24–48 hr
- Set the furniture out
- 7 days
- Keep it damp until
- 7 days
- Full design strength
- 28 days
Every line the patio calculator runs
- Patio area, rectangular
- length × width
- Patio area, round
- π × (diameter ÷ 2)²
- Volume in cubic feet
- area × (depth ÷ 12) × (1 + waste)
- Cubic yards
- cubic feet ÷ 27
- 80 lb bags
- cubic feet ÷ 0.6
- 60 lb bags
- cubic feet ÷ 0.45
- Wire mesh
- area × 1.1
- Installed cost
- area × the finish rate
- Max joint spacing
- min(36 × depth, 15 ft)
- Saw cut depth
- max(depth ÷ 4, 1 in)
Why the waste goes in first
The allowance is applied to the volume before the bag counts and before the yardage is rounded, so the figure on screen is already the figure to order. You do not add 10% to it a second time at the yard.
Ten percent is the working default on flat, well-compacted base. Go to 15% if the subgrade is soft, the forms are curved, or you are pouring bagged concrete where every short bag is a fresh trip to the store.
Cost ranges are national installed rates by finish and move with your market. Confirm yardage and the short-load threshold with your supplier before you book.
Finishes · grip and upkeep
Concrete patio finishes compared on price, grip and upkeep
Price is the easy column and the least important one. A patio is horizontal, outdoors and wet several months a year, so grip and resealing are what you live with.
Broom Finishyour finish
$8–$14 /sq ft
Rinse, reseal only if you want the colour up
Good wet grip from the drag marks
The default patio. Best value, hardest to get wrong.
Exposed Aggregate
$12–$20 /sq ft
Reseal every 3 to 5 years
Best of the five, the stone stands proud
Pool surrounds and anywhere that stays wet.
Acid Stained
$12–$22 /sq ft
Reseal every 2 to 3 years or the colour flattens
Depends entirely on the sealer you pick
A patio you want to read as one colour field.
Stamped Concrete
$15–$28 /sq ft
Reseal every 2 to 3 years, about $0.50/sq ft
Grout lines help, the sealer hurts
Stone or brick looks without paver joints to weed.
Polished Concrete
$14–$25 /sq ft
Buff and reseal, and keep it under cover
Slick once wet, the weak point outdoors
Covered porches and sunrooms, not open yard.
At the edges
Habits that keep a concrete patio flat and dry
Not a sequence, just the eight things that separate a patio still worth sitting on in ten years from one you are replacing.
4 inches of concrete is the standard minimum for a patio. Go with 6 inches if you plan to put heavy furniture, a hot tub, or a fire pit on it.
Use our concrete slab calculator to estimate exact cubic yards before ordering a ready-mix truck. Over-ordering by even half a yard wastes $75 to $100.
Check our concrete cost calculator to compare patio costs against driveways, sidewalks, and other project types side by side.
Broom finish is the best value for patios. It costs almost nothing extra, provides good slip resistance when wet, and hides minor surface imperfections.
Stamped concrete mimics stone, brick, or slate at 40 to 60% less cost than real pavers. Budget for resealing every 2 to 3 years at about $0.50/sq ft.
Always slope your patio 1/8 inch per foot away from the house for drainage. A 12-foot patio needs a 1.5-inch drop from the house side to the far edge.
Run the isolation joint the full length of the house wall and keep the slab off the foundation. A patio bonded to the house has nowhere to move, so it lifts the joint or cracks at the door instead.
Replacing an old patio? Our concrete removal calculator estimates demolition and haul-away costs before the new pour.
Before you set forms
Answers on patio thickness, joints and curing
The nine questions homeowners ask before a patio pour, answered against the same rates and standards this calculator runs on.
How much does a concrete patio cost?
A standard broom-finish patio costs $8 to $14 per sq ft installed. A 192 sq ft (16x12) patio runs $1,536 to $2,688. Stamped or stained finishes increase this to $12 to $28 per sq ft.
How thick should a concrete patio be?
4 inches is the minimum for foot traffic and patio furniture. Use 6 inches if you plan to park a grill, hot tub, or heavy planters on it. Thicker concrete costs more but lasts decades longer.
How far apart should control joints be on a concrete patio?
NRMCA CIP 6 puts maximum joint spacing at 24 to 36 times the slab thickness, so a 4-inch patio takes joints about 8 to 10 feet apart, and no panel should span more than 15 feet. Keep panels square or nearly so, with the length no more than 1.5 times the width.
Is stamped concrete worth it for a patio?
Stamped adds $7 to $14 per sq ft over broom finish but looks like natural stone or brick. It costs 40 to 60% less than real pavers. The tradeoff is resealing every 2 to 3 years.
How long does a concrete patio take to cure?
You can walk on it after 24 to 48 hours. Light furniture after 7 days. Full cure takes 28 days. Do not place heavy items or drive on it before then.
Do I need a permit for a concrete patio?
Most cities require a permit for patios over 200 sq ft or those attached to the house. Check your local building department. Permits typically cost $50 to $200.
What base prep does a concrete patio need?
Remove 6 to 8 inches of soil, then compact 4 inches of crushed gravel as a sub-base. This prevents settling, cracking, and frost heave. Skipping the base is the top cause of early patio failure.
What slope should a patio have for drainage?
Slope the patio 1/8 inch per linear foot away from the house. A 12-foot-wide patio should drop 1.5 inches from the house side to the far edge. This prevents water pooling and foundation damage.
Should I DIY my concrete patio or hire a pro?
DIY saves 40 to 50% on labor but requires renting a mixer, building forms, and finishing before the concrete sets. Patios under 100 sq ft are manageable for experienced DIYers. Larger patios or stamped finishes should be left to professionals.
Disclaimer
These estimates are for planning purposes only. Actual costs vary by location, material availability, and project complexity. Always get at least 3 local quotes. This calculator does not replace professional advice.
Sources
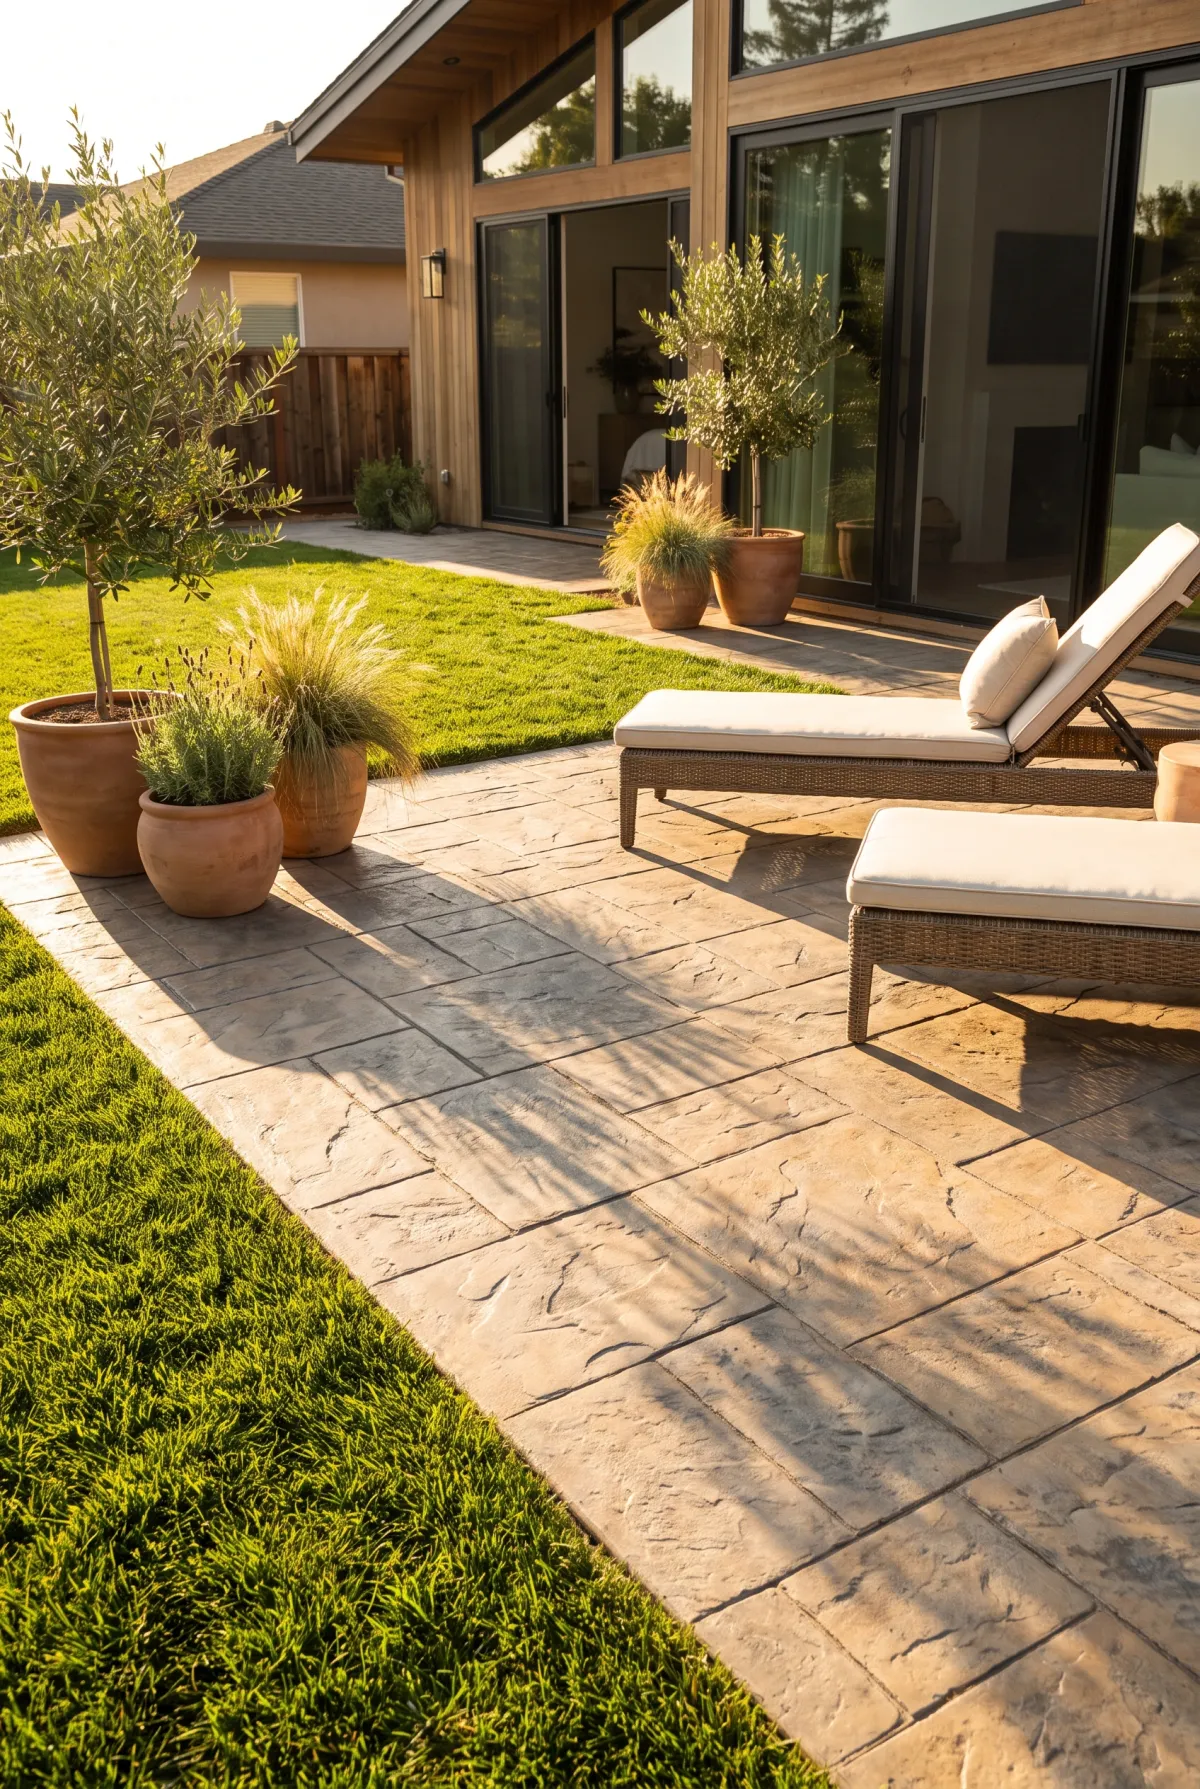
See 15 concrete patio ideas
Browse the looks, then price yours here.