Blown-In Insulation Calculator
Estimate bags, blown depth and cost for cellulose, fiberglass or mineral wool.
Area and target
Material
Where it goes
Estimates only. Not professional advice.
Bags to buy
38
Cellulose blown over an attic floor, starting bare, at a 10% allowance.
- Bags at $12 each
- $456
- Installed by a crew
- $2,500
- Blow to, before settling
- 11.8 in
- Coverage per bag
- 29.5 sq ft
Last updated August 6, 2026. Checked against the 2021 IECC and ASTM C739 by our expert review team.
Over the joists
Blown-in insulation depth over your ceiling joists
Nobody buying insulation thinks in inches. They think about whether the layer covers the joists. Here is your bay cut through, at one scale on both axes, with the depth you blow and the depth you are left with a year later.
Both axes share one scale, so the layer really is that deep next to that joist. Nothing is on the ceiling yet, so the whole layer is new material.
The bag count covers the settled depth at your 10% allowance. Blowing all the way to the 11.8 in line takes 15%.
What the drawing assumes
2021 IECC · ASTM C739
- Framing drawn
- 2x8 at 16 in o.c.
- Attic density
- 1.5 lb/cu ft
- Dense-pack density
- 3.5 lb/cu ft
- First-year settling
- 15%
The ruler test
R-value to blown-in insulation depth, by material
Every figure below is a target R-value divided by that material R per inch, which is the same arithmetic the panel above runs. Read down your climate zone row, not across.
Every depth here clears the 7 1/4 in joist in the drawing above, so any of these targets buries the framing. What changes is by how much: 16.2 in of cellulose reaches R-60, while 15.2 in of fiberglass only reaches R-38.
Bag counts
How many bags of blown-in insulation: four jobs worked out
All four run through the same arithmetic as the panel above, at a 10% allowance, so you can put your own ceiling beside them.
Bare attic
30 bags
$360 · 10.3 in
800 sq ft · R-38 from bare · cellulose
Nothing on the ceiling yet, so the whole R-38 comes out of the hopper. Two people, one afternoon, one machine.
Top-off over batts
30 bags
$360 · 8.1 in
1,000 sq ft · R-49 over R-19 · cellulose
The R-19 batts stay where they are and only the missing R-30 gets blown, which is why a bigger attic takes the same bags as the one above it.
Cold-climate fiberglass
100 bags
$3,000 · 24 in
1,500 sq ft · R-60 from bare · fiberglass
Fiberglass at R-2.5 per in needs the deepest layer on this page. At this bag count, price a professional crew before you rent.
Wall dense-pack
34 bags
$408 · 3.5 in
1,200 sq ft · R-13 from bare · cellulose
Thinnest layer, most material: dense-pack goes in at 3.5 lbs per cubic foot instead of 1.5, so a shallow cavity swallows bags.
Baffles and dams
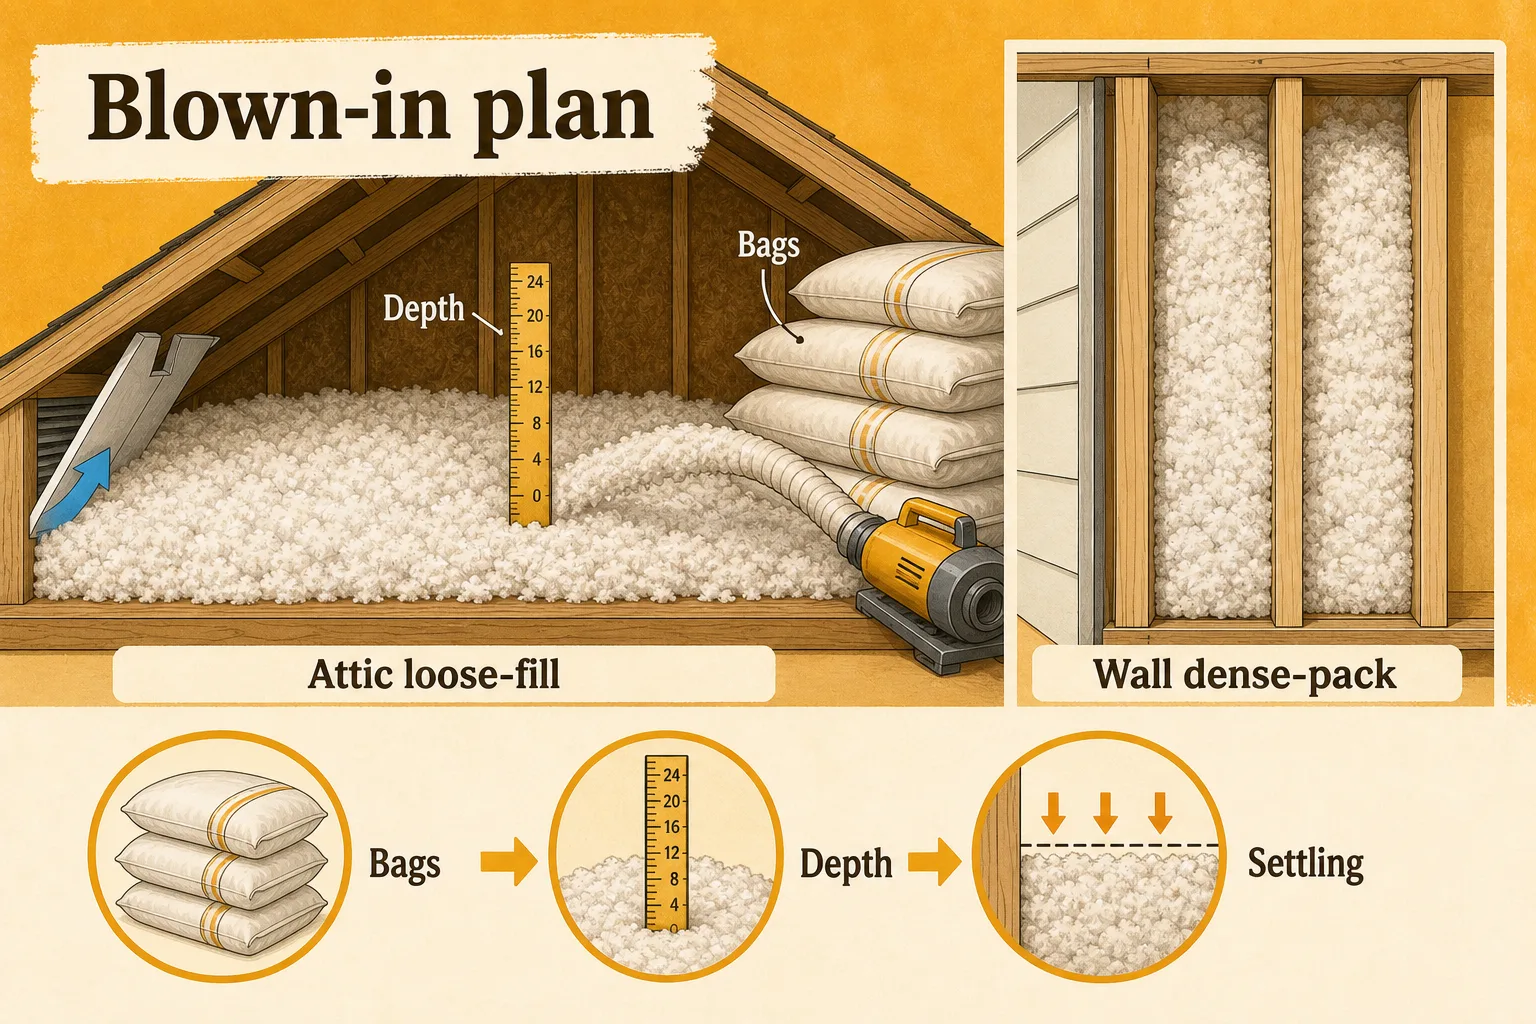
What an attic needs before the blown-in insulation hose starts
The hose is the last hour of the job. Everything that decides whether the layer works happens on your knees before the machine is switched on, and none of it can be retrofitted once the attic is full of loose fill.
- 01
Seal the ceiling first. Foam around every wire, pipe and flue penetration, caulk the top plates and gasket the hatch. Loose-fill is a heat brake, not an air barrier, and warm air that gets past it takes the moisture with it.
- 02
Box out anything that gets hot. Old recessed cans that are not IC-rated need a clearance dam, and so does the flue. A cardboard or metal collar three inches clear, taller than the finished depth, keeps material off it permanently.
- 03
Baffle every rafter bay at the eave. One skipped bay closes its own intake, and the roof pays for it in condensation. Staple them before you can no longer reach the eave over the new depth.
- 04
Dam the hatch and any walkway. A board or a stiff bag wall at the finished depth stops the layer from sliding down the hole every time you open it.
- 05
Staple depth markers at the corners and the centre. Mark the blow line, not just the finished depth, so you can read the overblow while the hose is still in your hands.
- 06
Start at the far wall and back out. Sweep the hose across the joists rather than filling one bay at a time, then read all the markers before the machine goes back in the truck.
After it settles
Where a blown-in insulation job loses the R-value you paid for
None of these show up on the receipt. Every one of them shows up on the bill twelve months later, and four of the six are decided before a single bag is opened.
Blowing before the ceiling is air sealed
Loose-fill slows conducted heat but does nothing to a moving air stream. Warm indoor air keeps going straight past it through wire holes, top plates and light cans.
Caulk and foam every penetration first. Air leakage is 25 to 40% of the loss you are trying to stop, and it is the cheapest half of the job.
Letting the layer bury the soffit vents
Material slumps into the eave, the intake path closes, and the roof gets moisture, mold and ice dams instead of airflow.
Staple a rafter baffle in every single bay before the hose goes in, then blow up to the baffle rather than past it.
Ignoring settling and stopping at the target depth
A cellulose layer blown exactly to depth loses 15% of it in the first year, so the ceiling quietly drops below the R-value you paid for.
Blow to 11.8 in and let it settle back to 10.3 in. Keep the allowance in the panel at 15% or more so the bag count carries the overblow.
Crushing the old batts under the new layer
Compressed fiberglass loses R-value roughly in proportion to the depth it loses, so both layers end up worth less than they were.
Blow loosely on top and let the material find its own level. Never walk the finished surface to level it out.
Blowing an even-looking layer instead of a measured one
A hose held still piles material at the near end of the attic. From the hatch the surface looks flat and the far corners are half depth.
Read the depth markers in four places before you pack up. Half the depth is half the R-value and roughly half the saving.
Using attic density in a wall cavity
Loose-fill blown at attic density into a closed stud bay settles and leaves a void at the top of the wall within a few years.
Dense-pack at 3.5 lbs per cubic foot with equipment that can hold pressure, which is why the wall setting here uses more than twice the material.
Blower day
Blower-day tips for blown-in insulation
Not a sequence, so not numbered. These are the six things that decide whether the job takes an afternoon or a weekend.
Staple a stiff ruler or a marked stick to a joist at each corner and one in the middle before you start. Depth is the only thing you can check from the hatch afterwards, and a bag count proves nothing about where the material landed.
Big box stores lend the blower free with 20 bags or more, which saves the $50 to $150 rental. Book it for the morning: the machine is the bottleneck, not the bags.
One person feeds the hopper and one runs the hose. Working alone means climbing down every third bag, which is how an afternoon becomes a weekend.
Blowing over batts rather than starting bare changes the depth, not the method. Our attic insulation calculator compares batt and blown layers for the same ceiling.
Work from the far corner back toward the hatch so you never crawl over finished material. Compressed loose-fill does not spring back.
Cellulose has its own settling and density rules worth reading before you buy. The cellulose insulation calculator covers dense-pack densities in detail.
The coverage chart
How this calculator turns R-value into bags of blown-in insulation
Every bag prints a coverage chart on the side: so many square feet at so many inches. This works that chart backwards from the R-value you asked for.
Existing R comes off the target first, so a top-off only pays for the shortfall. What is left, divided by the material R per inch, is the depth, and depth times area times the bag coverage rate is the bag count. The wall setting multiplies that by 2.2, because dense-pack goes in at more than twice attic density.
add R = target R − existing Rdepth = add R ÷ 3.7 per inbags = area × rate × depth × use × (1 + allowance)blow line = depth × 1.15weight = bags × 25 lbThe crew price is an area rate, $2.50 per sq ft on an attic floor and $3.50 per sq ft in a wall, so it moves with area rather than with bags. Air sealing, baffles, blower rental and electrical work are not in either figure.
Numbers behind it
- Cellulose
- R-3.7 per in
- Mineral wool
- R-3.3 per in
- Fiberglass
- R-2.5 per in
- Cellulose settling
- 10 to 20%
- Wall multiplier
- 2.2x
- Free blower rental
- 20+ bags
R per inch is the manufacturer figure at settled density. Blowing thinner than the chart says does not get you a thinner version of the same R-value.
On the attic floor
Blown-in insulation questions: settling, walls, going over batts
Eight answers, opening with the bag-count question the panel at the top of this page is built to settle.
How many bags of blown-in insulation for a 1,000 sq ft attic?
About 38 bags of cellulose to go from bare joists to R-38, which is 10.3 inches deep. The same attic in blown fiberglass takes 15.2 inches and about 42 bags, because fiberglass carries R-2.5 per inch against cellulose at R-3.7.
Cellulose or fiberglass for blown-in insulation?
Cellulose costs about $12 a bag against $30 for fiberglass and packs tightly around wires and framing, so it slows air movement better. Fiberglass will not absorb water and settles less, but it needs about half again the depth for the same R-value.
How thick does blown-in insulation need to be for R-38?
10.3 inches of cellulose, 11.5 inches of mineral wool, or 15.2 inches of fiberglass. R-49 takes 13.2, 14.8 and 19.6 inches. Divide the target R-value by the material R per inch to get the depth.
Can I blow insulation over existing batts?
Yes, as long as the old layer is dry and free of mold. Do not compress it, because a crushed batt gives up R-value that the new layer then has to replace. Blow across the joists rather than only between them, so the framing stops short-circuiting the layer.
How much does blown-in insulation cost?
DIY cellulose runs $0.50 to $1.00 per square foot in bags. Professional attic installation runs $1.50 to $2.50 per square foot, and wall dense-pack runs closer to $3.50 because of the drilling and patching.
Does blown-in insulation settle?
Cellulose loses about 15% of its depth in the first year, so blow 11.8 inches to settle at 10.3. Blown fiberglass loses closer to 7% and mineral wool about 5%. Depth markers left on the joists are how you check it a year later.
Can blown-in insulation go into walls?
Yes, as dense-pack through 2 inch holes drilled into each stud cavity, at 3.5 lbs per cubic foot instead of the 1.5 lbs used on an attic floor. That takes more than twice the material per square foot and a machine that can hold pressure.
What R-value should blown-in insulation reach in an attic?
R-38 in climate zones 2 and 3, R-49 in zones 4 and 5, and R-60 in zones 6 through 8 under the 2021 IECC. Walls are a separate target, at R-13 to R-21 depending on the zone.
Disclaimer
These estimates are for planning purposes only. Actual costs vary by location, material availability, and project complexity. Always get at least 3 local quotes. This calculator does not replace professional advice.
Sources